[Back to the SOLUTION GUIDE Table of Contents:]
1. Assess backup requirements
Assess the backup requirements of your customer by identifying the following:
Critical application servers, such as Exchange, SQL, and SharePoint
The recovery point objective for critical applications
Where to store volume backup images
Data that must be retained for years, because of compliance or company policy
Files that users may want to restore individually or access from the web
2. Provision accounts
a) Create an account as needed on the Axcient Web Portal.
For complete instructions, see Create an account using the New Account Wizard .
b) Verify that the correct versions of ShadowProtect and ImageManager are installed.
The MSP installer can be found here:
3. Install ShadowProtect
Install ShadowProtect on each server that requires volume backups.
Do not use the PUSH install included with ShadowProtect. Instead, use the installable package and install the complete package on your agents being backed up.
Note: The server must be rebooted prior to performing the first full backup.
4. Prepare to configure ShadowProtect
Prior to configuring ShadowProtect, complete the following preparation steps:
• Disable automatic defrag in the task scheduler. Windows adds one automatic defrag by default on Wednesday, in the early morning.
• Do a one-time defrag before the first full backup.
• Add exceptions to the firewall for ShadowProtect (or turn the firewall off).
• Set the ShadowProtect Service to run as the highest level admin, domain, or local admin. (This setting is based on whether the protected server is in a domain or not.)
• Disable Shadow Copies on each of the volumes to be backed up.
5. Configure ShadowProtect
a) On the BDR desktop, click the ShadowProtect icon to open the ShadowProtect Console.

b) Click the Management View tab.
To add additional managed computers to this console:
1. To add computers which already have a ShadowProtect agent installed to this Management View console, click the Add icon: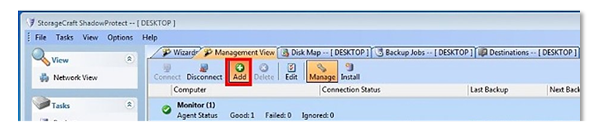
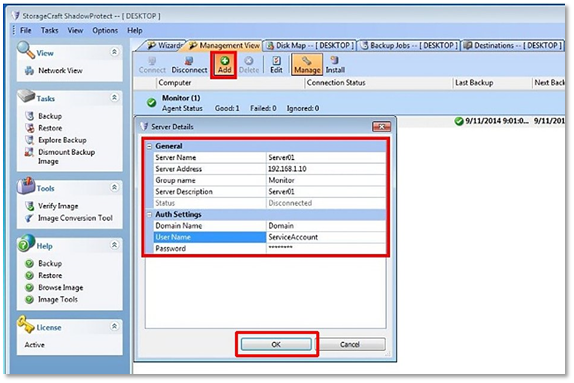
2. Enter data in the fields for Server Name, Server IP Address, Group name, Server Description (this can be the server name), Domain (or server name), User Name, and Password.
NOTE: Create a group called Monitored, if you wish the agents to stay connected.
3. When all fields are completed, click OK.
The newly-added computers which have a previously-installed ShadowProtect agent will now display in the list on this console.
Connect and manage from this console
1. Highlight the desired computer and click Connect.
2. After the computer shows Connected, click Manage.
Note: When you are actively managing a computer, that computer’s name appears in new tabs along the top and in the Window banner. 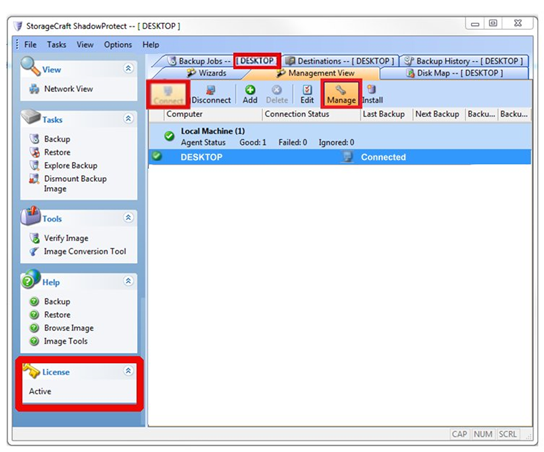
Also, notice that the license status for the server you are currently managing is now shown in the bottom left corner.
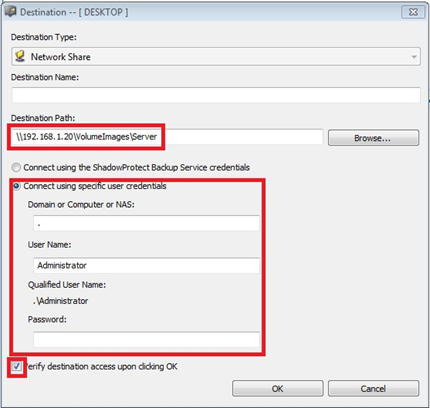
Create a new destination
1. Before creating a new job, click on the Destinations tab.
2. Then click the Add button to create a new destination.

3. Enter the destination path and the ShadowProtect credentials in their respective fields.
4. Next, check the checkbox for the Verify destination access upon clicking OK field; then, click OK.
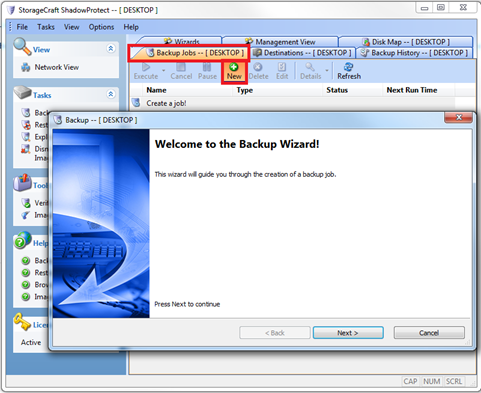
Create a new backup job
1. To create a new backup job, click the Backup Jobs tab; then, click the New icon to start the Backup Wizard. Click Next to continue.
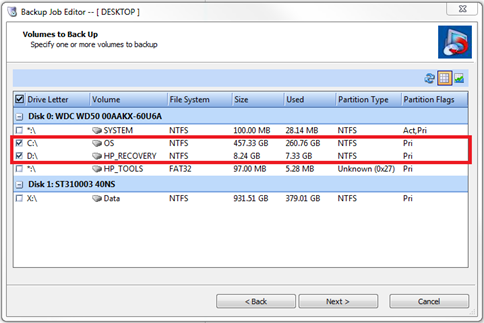
2. Select the volume(s) for which you want to create images. Click Next to continue.
Note: It is important that the volumes be together in the same job.
If you are running Exchange or SQL and the logs are not on the same volume as the application database, the logs will not truncate unless the volumes are together in the same backup job.
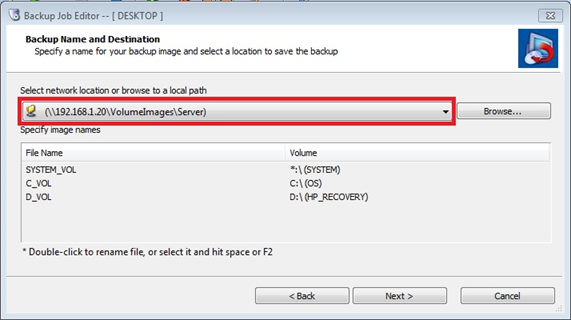
3. Click the down arrow and select the destination previously created. Click Next to continue.
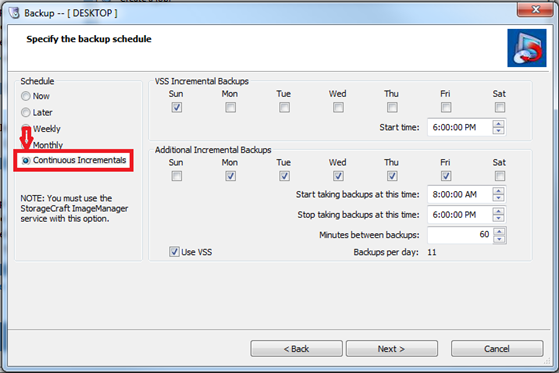
4. On the Specify backup schedule screen:
a. Select Continuous Incrementals.
b. Set the desired schedule.
The schedule on the top row runs a single incremental backup.
The schedule on the second row runs multiple backups according to the set schedule.
c. Click Next to continue.
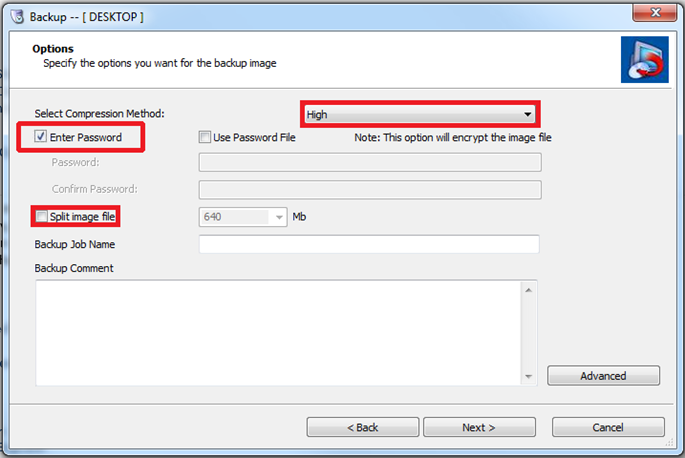
5. On the Options screen:
a. Select High compression method. High has approx.50% compression vs Standard at approx.. 40%.
b. IMPORTANT: Check the Enter Password box. This encrypts your backups with a passphrase. If this box is not checked, backups will be rejected when the Axcient cloud preload occurs.
c. Confirm that the Split image file check box is unchecked. Do not split the image files.
d. Click Next to continue.
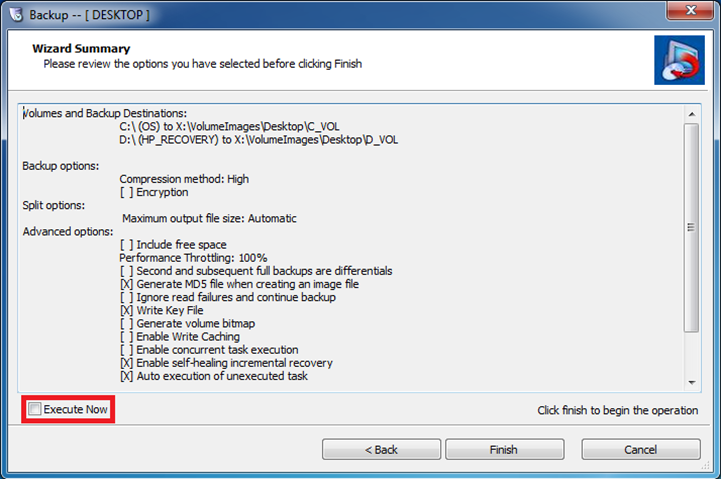
6. On the Wizard Summary page:
a. Leave the Execute Now checkbox unchecked. This will run the initial backup at the next scheduled time.
b. Click Finish to complete the new backup job setup.
Note: If you wish to run the backup immediately, select the Execute Now checkbox.