
Having your new x360Recover BDR appliance shipped pre-configured for DHCP IP address assignment is convenient for initial deployment.
But there are some critical reasons that you should never leave your devices set for DHCP long term.
- First, simple DHCP addressing is not guaranteed. Sooner or later, the address assignment will change, unless you set a static reservation in your DHCP server. If the IP address changes, all of your backups will stop, since the agent will be configured for the wrong address.
- Even if you take the time to assign a static reservation, the IP address allocated to your device is still not guaranteed. In the event that the DHCP server is DOWN (presumably said server is running on one of your protected systems being backed up by the appliance, after all) you will lose your IP address on the device! This is doubly troublesome, since if the customer server AND the backup server are inaccessible, you will likely have to go on-site to resolve the problem. This can greatly delay the process of getting your customer’s critical services back up and running in a timely manner.
The simplest (and best) recommended practice is to always assign a static IP address to your backup BDR devices, preferably outside the scope of the DHCP server IP range so there is no possibility of conflict.
If your device has an IPMI device of some type, this also should be configured with a fixed static IP address. Presumably you have firewall rules or VPN tunnels in place to allow access to that IPMI address for remote troubleshooting, and you want to ensure that it works when all other devices are dead or down.
How to change an appliance IP from DHCP to static:
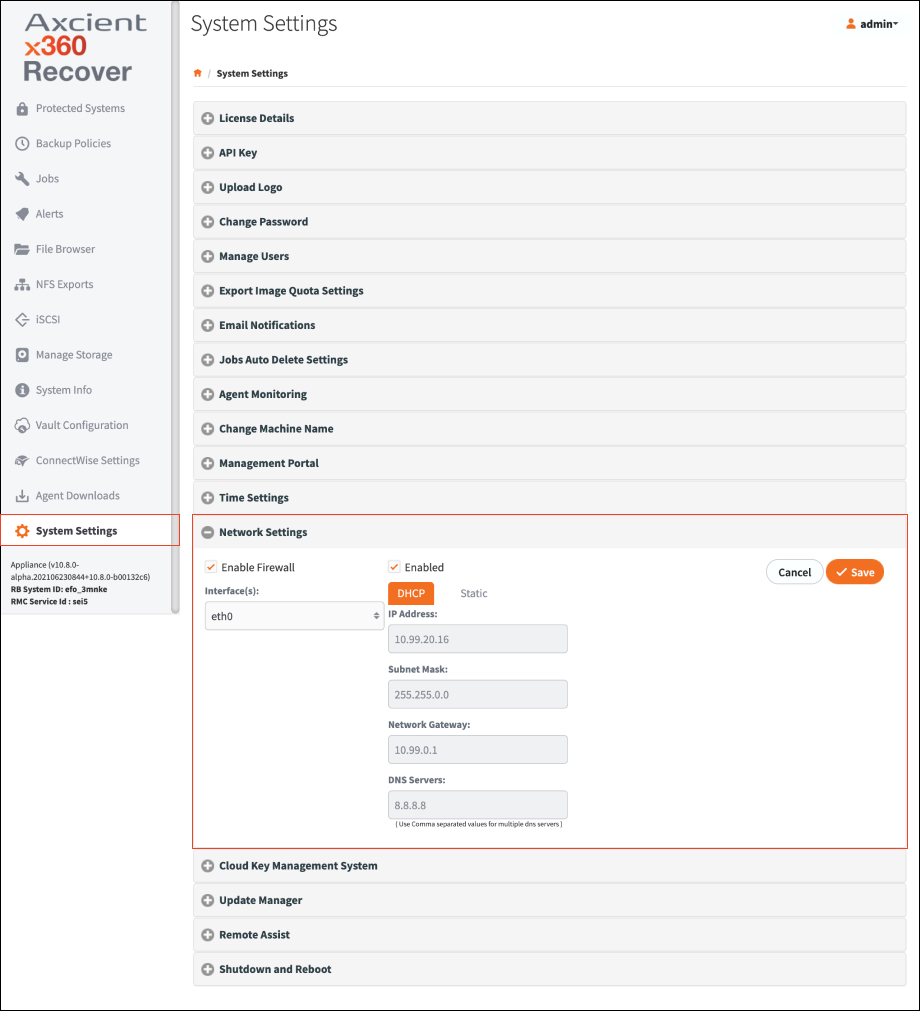
The Network Settings screen manages names, firewall enabling and IP selections on the device.
- From the Appliances drop-down list, select the desired Appliance name/IP address. (Multiple devices will only exist if a cluster has been configured).
- Check the Enable Firewall box.
- From the Interface(s) drop-down list, select your interface from the selections.
- Select DHCP or Static.
- If you selected Static, enter IP address, Subnet Mask, Gateway, and DNS Servers. Multiple DNS Server entries may be entered separated by a comma.
- Click Save.
NOTE: Additional network adapters may be configured to provide access to additional network segments, or to segregate iSCSI or NFS traffic from backup traffic using separate network paths
SUPPORT | 720-204-4500 | 800-352-0248
- To learn more about any of our Axcient products, sign up for free one-on-one training.
- Please contact your Partner Success Manager or Support if you have specific technical questions.
- Subscribe to the Axcient Status page for a list of status updates and scheduled maintenance.