
Moving files and folders
When a file or folder is added to protection, the Online Backup Manager (OBM) is programmed to know where that file or folder is, at the time.
If that file or folder is later moved to a different location on the source machine, the Online Backup Manager cannot see it any longer and marks it as a deleted.
Be aware that anytime a file or folder is moved from one protected folder into another, the file or folder will be marked as deleted. Typically, this move will not cause problems. Retention will continue to apply and the file or folder will be kept per the retention period.
Use the Move button
If you want to move files or folders on the source machine and the file or folder will no longer be protected under an existing folder that is present on the Folders tab of the Online Backup Manager, it is very important that you use the Move button in the Online Backup Manager.
DO NOT use the Delete button and then re-Add the folder to the backup.
Doing this will cause the data to duplicate and the original data will be orphaned. Orphaned data WILL NOT have a retention applied to it, and will sit in the cloud until it is manually deleted. This will lead to an increase in space usage in the cloud, and can lead to an increase in your monthly bill.
How to move a file or folder’s location within the Online Backup Manager using the Move button:
1. Open the Online Backup Manager’s Folders tab.
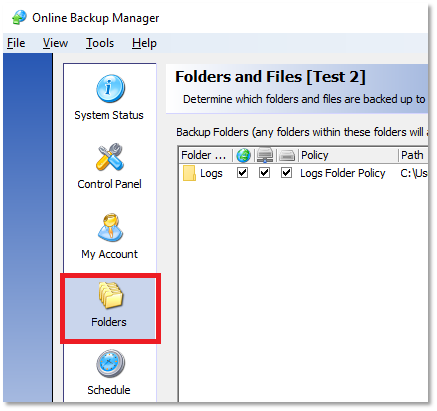
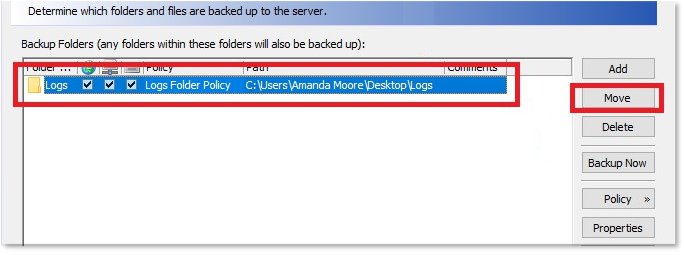
2. Select the desired folder (whose location has been moved) on the protected machine.
Click the Move button.
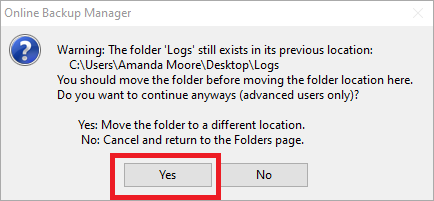
3. When the "Do you want to move the folder to a different location" warning box opens, click Yes.
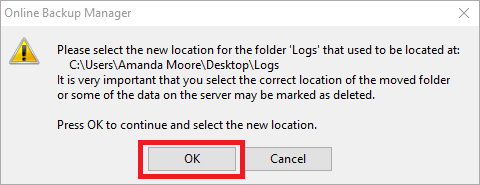
4. When the "Press OK to continue and select the new location" warning appears, click OK to continue.
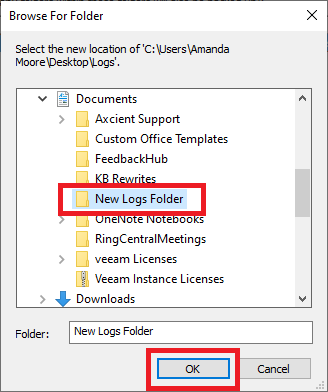
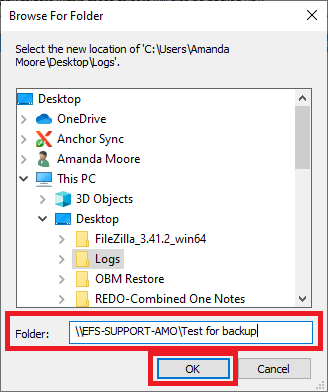
5. Select the new location.
Note: If the new location is a network location, you may need to manually type the UNC path into the “Folder:” box.
Click OK to continue.
| New location: |
OR |
New location on a network: |
 |
 |
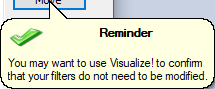
6. A reminder will pop up.
If you want to verify that the correct files/folders are protected, you can click the Visualize! button and verify that the proper folders are protected.
If you do not want to do this, or if you have completed your review using Visualize!, click Save.
7. To confirm that the necessary changes have taken place, run a manual Backup Now from the System Status tab. You can also choose to allow the backup to run as scheduled and verify that everything has backed up properly, after the next scheduled backup.