
When you have an x360Cloud reseller account, you can log in to the x360 portal and create an organization to protect Google Workspace accounts.
Note: If you need to create an organization for a Microsoft 365 account, please click here.
Enable IMAP
Before creating an organization to protect Google Workspace accounts, it is important to ensure that IMAP is enabled for all users in the Google Workspace tenant that you wish to protect. To enable IMAP:
1. Log in to your Google Admin console at admin.google.com
2. Go to Apps > Google Workspace > Settings for Gmail > End User Access.
3. To apply the setting to all users, leave the top organizational unit selected
4. Scroll to POP and IMAP access
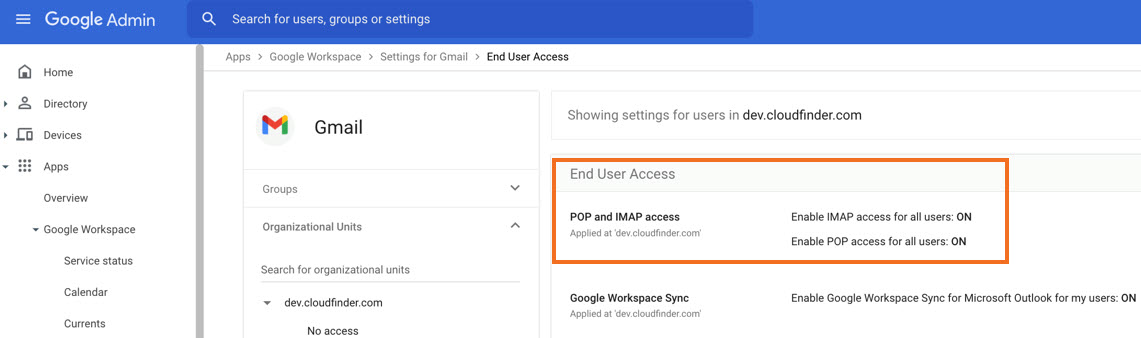
5. If IMAP is not already enabled for all users, click on the POP and IMAP access section
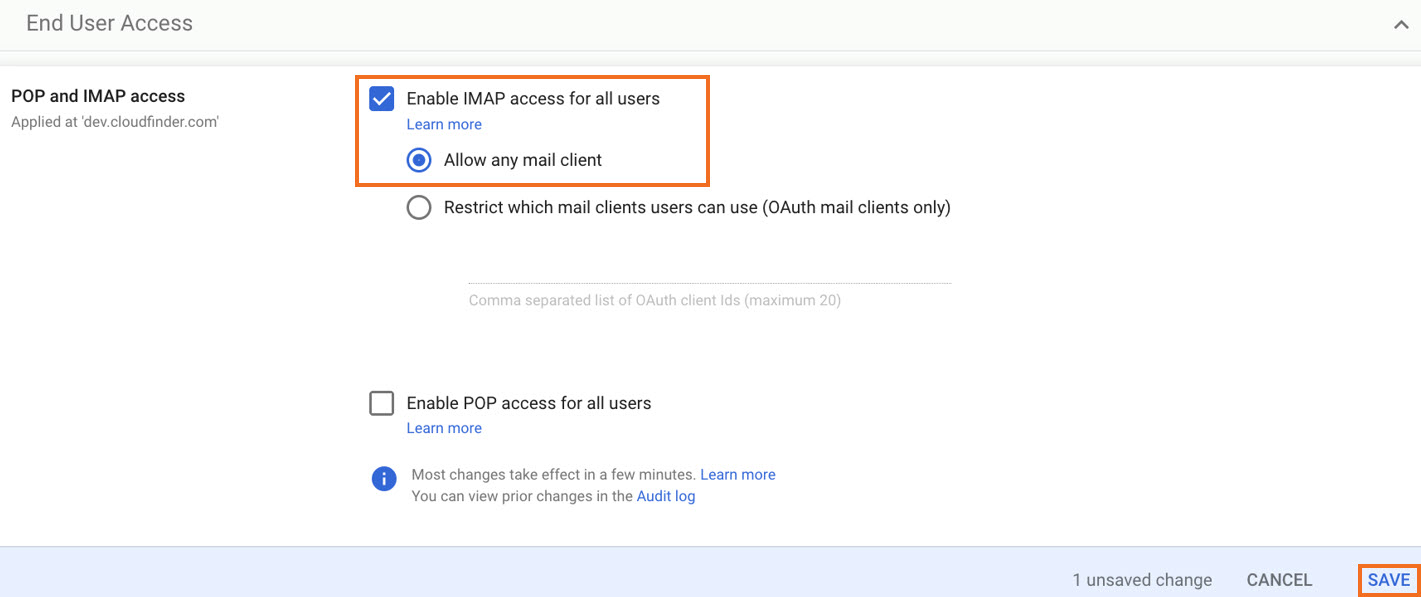
6. Then check the Enable IMAP access for all users checkbox
7. Choose the Allow any mail client radio button to ensure any IMAP email client can sync with Gmail
8. Click Save
Note: It can take up to 24 hours for IMAP changes to take effect. You can proceed with creating and configuring your new organization in x360Cloud.
Log in and create an organization
To log in to your x360Cloud reseller account:
STEP 1: Launch x360Cloud
In the x360 Portal, find the x360Cloud product card and click the Launch link:

STEP 2: Add an organization
If this is the first time you are accessing the x360Cloud Reseller Portal, you will be directed to the Back Up Your First Organization page.
Click the Add Organization button.

Note: If this is not your first organization, click the Add Organization button located at the top of the left-hand navigation bar.

STEP 3: Enter organization information
On the New Organization page, enter all required information about the new organization, as outlined below.
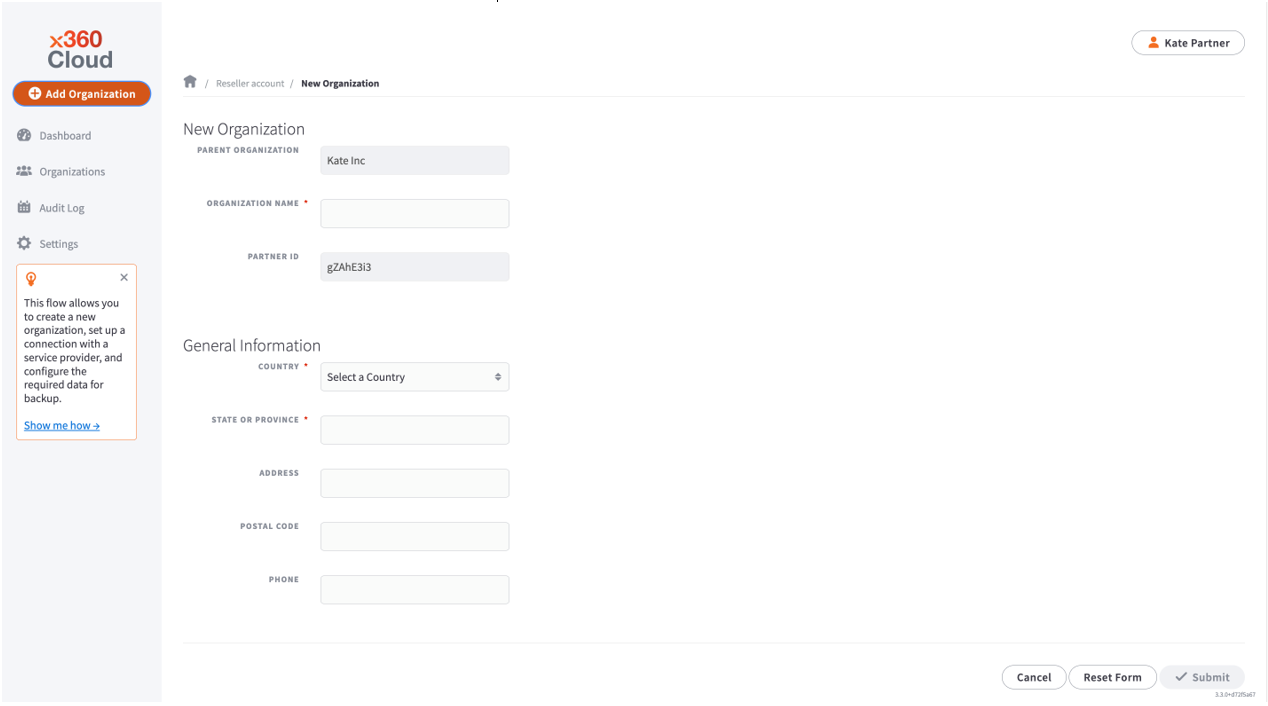
- In the New Organization section, enter descriptive information about the new organization, including:
- In the read-only Parent Organization field, you can view the name of the parent organization under which this new organization will be created. The parent organization is typically the name of your reseller account.
- In the Organization Name field, enter the name of the new organization.
- In the read-only Parent ID field, you can view the ID of the parent organization. The parent organization is typically your reseller account.
- In the General Information section, enter contact details for the new organization, including:
- In the Country drop-down menu, select the organization's country.
- In the State or Province drop-down menu, select the organization's state or province.
- In the Address field, enter the street number and street name of the new organization
- In the Postal Code field, enter the organization's postal code .
- In the Phone field, enter the phone number of the new organization.
Click the Submit button when you are finished.
STEP 4: Authorize Google Workspace
On the next page, click the Authorize button.

STEP 5: Select service to be protected
Select Google Workspace (also referred to as G Suite) as the service you wish to protect for this organization:

STEP 6: Sign in to Google Workspace
To install the x360Cloud application, sign in to your Google Workspace account.

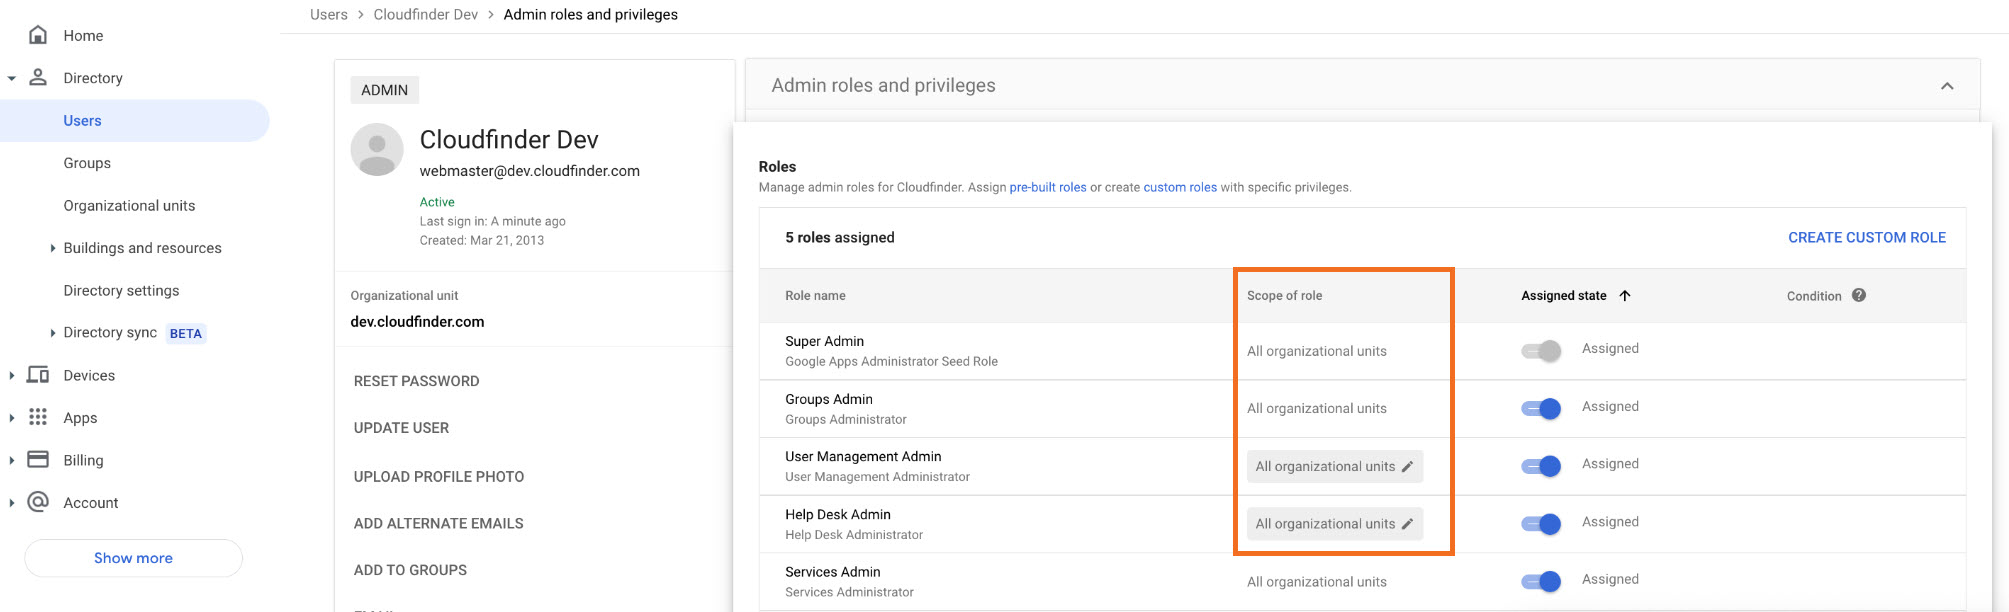
In the Email or phone field, enter the email address of a Super Admin associated with all organizational units of your Google Workspace account and click the Next button.

Note: You must enter the email address of a Super Admin whose Scope of role includes All organizational units, as shown below. If not, the application will still install successfully, but will only apply to limited organizational units and only those limited units will be backed up.
Enter the Google Workspace account password and click Next.

STEP 7: Install the x360Cloud app
Click the Domain Install button to begin installing the x360Cloud application.

Grant the needed permissions to your Google Workspace data by clicking Continue.

Click the check box at the bottom of the page if you agree to the terms of service.

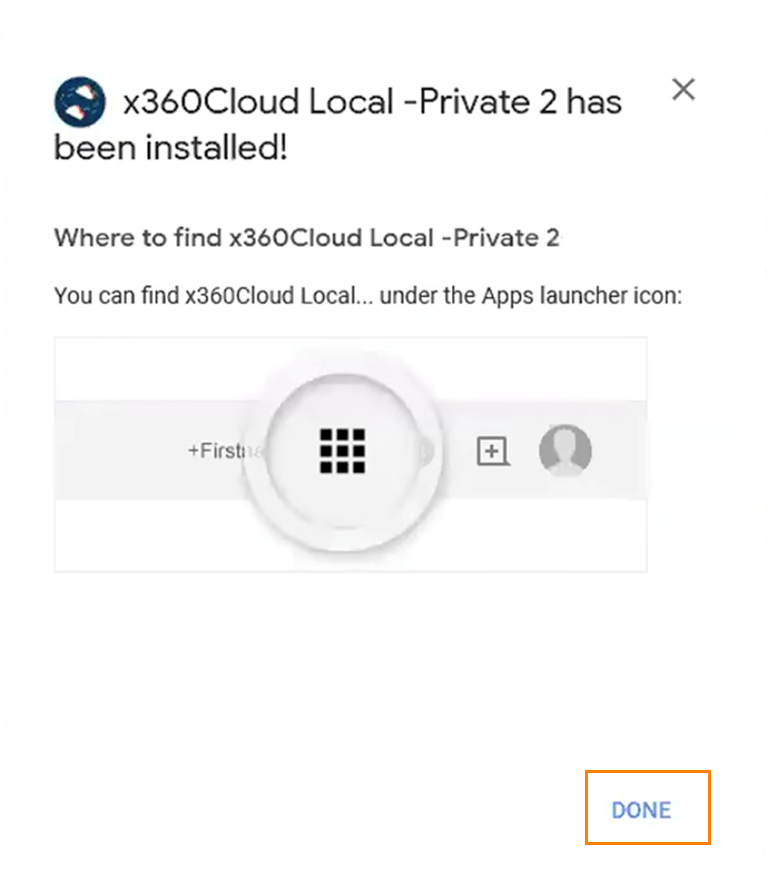
Click Finish to confirm granting the access rights.
Click Done to complete installation of x360Cloud application and to proceed with connecting the application to your created organization in x360Cloud:
STEP 8. Connect the x360Cloud app with your organization in x360Cloud
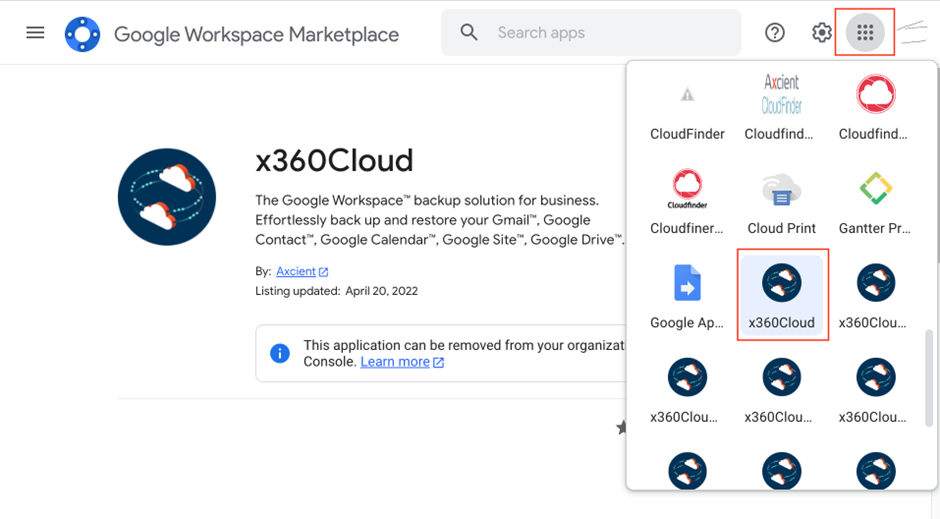
Click the Google Apps menu to open the pop-up dialog.
Click on the x360Cloud application icon in the dialog. (Refresh your browser if you do not see the app icon.)
STEP 9: Log in and add the provider
Log in to your Google Workspace account by clicking the Signed In link:

From the drop down menu, select the organization you wish to add the Google Workspace provider to.
Then click the Add Provider button.

STEP 10. Select services
Click the Select Services button:

In the Select services to be backed up pop-up window, check the services you wish to backup.

Please note: To protect shared drives, the registered Google Workspace admin user must be a manager of the shared drive. When you select a shared drive service to be backed up, the system will automatically add/modify the shared drive member list to include the registered Google Workspace admin user as a manager.
Click the Save button when you have completed your selections.
Finish up
Finally, on your reseller portal dashboard, go to the Settings page and specify if you want to automatically add all new Google Workspace users (and shared drives).

You can also configure other settings for the new organization on the Settings page, as needed.
Read more about how to configure x360Cloud organization settings here.
~~~~~~~~~~~~~~~~~~~~~~~~~~~~~~~~~~~~~~~
CUSTOMER SUPPORT | 720-204-4500 | 800-352-0248
- To learn more about any of our Axcient products, sign up for free one-on-one training.
- Please contact your Partner Success Manager or Support if you have specific technical questions.
- Subscribe to the Axcient Status page for a list of status updates and scheduled maintenance.
899 | 980 | 1116 | CF-10461